
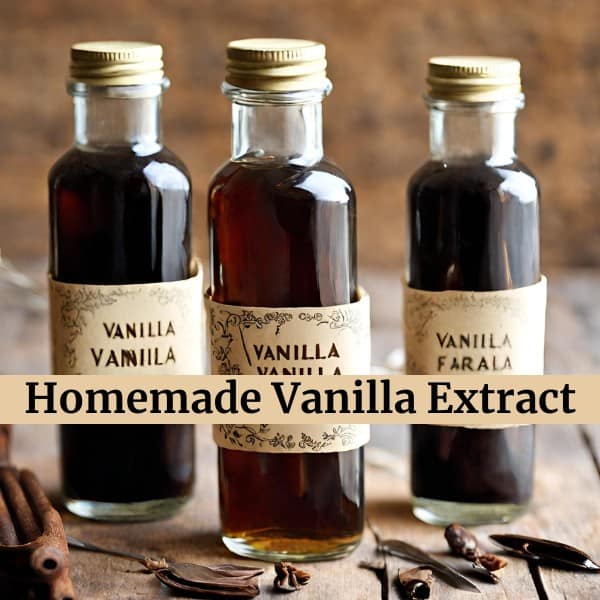
Homemade Vanilla Extract
Homemade vanilla extract is a simple yet flavorful ingredient that can take your baking and cooking to new heights. It’s made by infusing vanilla beans in alcohol over a period of time, allowing the complex flavors of the vanilla to blend with the liquid. Here’s what you need to know about making and using homemade vanilla extract:
You’ll also delight your taste buds with the delicious scent and flavor of homemade vanilla extract, which will become your new secret ingredient.
Why Make Vanilla Extract?
You might wonder, “Why make vanilla at home when I can buy it at the store?” The answer lies in the flavor of the vanilla itself. Store-bought vanilla extracts often have additives, artificial flavors and sweeteners that weaken the true vanilla taste.
By making your own vanilla extract, you can enjoy the pure flavor of the vanilla bean. That, in turn, makes everything you put it in taste better, naturally.
Quality: You will have a pure extract without additives, artificial flavors and sweeteners.
Flavor blends: You can use different types of vanilla beans and different alcohols for a unique flavor. Since vanilla is a spice, you can create a vanilla spice blend.
Saving Money: Really good quality vanilla is expensive, and making your own extract will save you money.
Make it for Gifts: Homemade vanilla makes the perfect gift for bakers.
The 2 ingredients you need
Creating vanilla extract is a labor of love, but it’s well worth the effort. You have to be patient for the vanilla to develop, which takes about eight weeks. With just two ingredients, vanilla beans and alcohol, it’s one of the easiest things to make in just 5 minutes.
- 8 ounces of alcohol, at least 70-proof
- 4 to 6 vanilla beans per eight ounces of alcohol
Choose The Best Beans
You can make vanilla extract using different types of vanilla beans, such as Madagascar, Mexican or Tahitian. Since you will need a large amount and the prices at grocery stores are quite high, I recommend that you buy vanilla beans in bulk online. They’ll be bigger and fresher than what you can find in most stores.
Three Common Beas are:
- Madagascar Bourbon Beans have a rich, creamy and robust flavor
- Tahitian Beans offer a fruity flavor
- Mexican Beans for a smoky flavor
Vanilla Bean Grades
There are two grades of vanilla beans to choose from:
Grade A: These beans are the most expensive and are meant for cooking and baking. They are longer and moist, and their high moisture content allows them to release their flavor quickly.
Grade B: These beans are meant for extraction, yield the most flavor, and are less expensive. They are shorter and appear more dried.
“I use spiced rum to make my vanilla extract, and the longer it sits — more than one year — the more the flavor will develop and become richer in tone. Additionally, homemade vanilla extract is a wonderful gift to give during the holidays.”
— Michelle, Sift and Simmer
Choose Your Alcohol
The alcohol’s job is to extract the vanilla compounds from the beans and the seeds. To effectively accomplish this, your choice of alcohol should have a minimum proof of 70. There’s no need to spend a lot on a fancy brand; a middle-of-the-road bottle will do the job.
Here are some options:
- Vodka: The most commonly used spirit for making vanilla extract because it is odorless and tasteless, allowing the fragrance of the vanilla to stand out.
- Rum: Adds a heavy, sweeter note to the vanilla. You can use white, gold or dark rum.
- Bourbon: Adds a smokey flavor to the vanilla.
- Brandy: Adds sweet and fruity notes to a homemade extract.
Making vanilla extract
Follow these simple steps to make your own vanilla extract. Give the vanilla time to extract, at least eight weeks. The end result will be a pure vanilla flavor that tastes amazing.
- Clean and sterilize one 8-ounce jar or bottle or two 4-ounce bottles or jars. Using bottles with lids or stoppers is suggested.
- Split the vanilla beans in half lengthwise. This will expose the seeds.
- Add the vanilla bean and any loose seeds to the container. If you are using a 4-ounce container, you may need to cut the beans in half to fit them into the jar/bottle.
- Add the alcohol to cover the beans, then seal the jar or bottle tightly with a lid. Gently shake each container to distribute the beans. Place the jars or bottles in a cool, dark place to infuse the flavors. Shaking the bottle occasionally.
- The extraction process usually takes about 8 weeks. The longer you wait, the more intense and complex the flavor will become. At this point, the vanilla is ready to use, and the vanilla beans can be removed. If the vanilla beans are left in the bottle, the flavor will continue to evolve, just like a fine wine. Just be sure the beans are always submerged in alcohol.
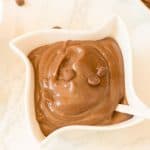
Vanilla plays a major role in recipes, expertly boosting the flavors of desserts like dark chocolate cookies and pecan tarts. Without its magical touch, these desserts would fall flat.
Make an alcohol-free version
What if you don’t drink?? Don’t worry about that! Glycerin is a great substitute for alcohol in making homemade vanilla extract. It’s worth noting that glycerine, while alcohol-free, retains alcohol’s preservative properties. This makes it a great choice for culinary vanilla extract with long-term storage in mind, especially if you want to avoid grain alcohol.
“I use glycerine to make homemade vanilla extract. Because I can not consume alcohol. When you make your own vanilla extract, you have more control over how strong you want the extract to be. And it is relatively cheaper in the long run.”
— Devy Dar, Soy Yummy Recipes
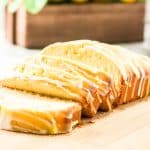
While waiting for your DIY Homemade Vanilla Extract to develop that amazing flavor, why not read about the different types of vanilla you can use to elevate your next baking masterpiece? Explore options like vanilla bean paste and aromatic vanilla sugar to enhance your culinary repertoire further.

How to Make Vanilla Extract
Equipment
- 8 ounce jar or two 4 ounce jars or bottles Using bottles with lids or corks is suggested.
- knife
- cutting board
Materials
- 1 ounce vanilla beans
- 1 cup alcohol of your choice
Instructions
- Clean and sterilize one 8-ounce jar or bottle or two 4-ounce bottles or jars
- Split the vanilla beans in half lengthwise to expose the seeds
- Add the vanilla bean and any loose seeds to the container, If you are using a 4-ounce container, you may need to cut the beans in half to fit them into the jar/bottle.
- Add the alcohol to cover the beans, add the lid, a gently shake each container to distribute the beans.
- Put the jars or bottles in a cool, dark place to infuse the flavors.
- Shake the bottle or jar occasionally
- After 8 weeks the vanilla is ready to use, and the vanilla beans can be removed.
- If the vanilla beans are left in the bottle, the flavor will continue to evolve, just be sure the beans are always submerged in alcohol.


6 Comments