Felted Wooly Bunny
Use a piece of felted wool sweater to make this Wooly Bunny. No knitting required!
Yield: 1 Bunny
Equipment
- embroidery floss can match the color of the wool OR you can use a contrasting color
- embroidery needle
Materials
- A piece of a felted sweater a thinner one works nicely here about 1/4 inch thick or less, save that big chunky one for mittens)
- wool roving for stuffing
Instructions
- Cut a square of the felted sweater, roughly 3-4 inches in size, this makes a nice starter bunny
- Fold it in half and make sure it’s pretty square, not aiming for perfect just very close
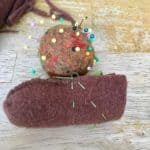
- Sew a running stitch (I used a contrasting color to help the stitches show up-you can use a matching color to make the stitches invisible) a little over halfway up from the bottom
- Then sew a 2nd running stitch in a triangle shape in the top of the square as shown in the picture

- Fold in half lengthwise, sew from the first running stitch, down the back

- then without tying off or making a knot sew a running stitch down and around the bottom as shown in the pictures, pull it tight and tightly sew several stitches to hold that seam shut
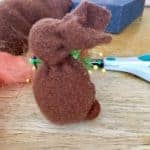
- In the neck opening poke in a little roving, as much as you like to make a plump bunny

- Pull that first running stitch to cinch up the neck, add more roving if needed, then tie off the neck

- Pull the second running stitch to form the head, add a little roving to the head, adjust as needed and tie off
- Trim the threads and add a tail and you’re done
- wool roving is easy to manipulate so if you want your bunny to sit up just smoosh the bunny down and encourage it into place