Recycled Wool Felted Bunny
Ohhh, these bunnies are TOO cute not to be excited about. And because you don’t have to be able to knit to make them, they’re so easy. Just about anyone can make them. Make one, make a dozen, or make them with a group of kids or adults, it doesn’t matter. Just make some Easy Wooly Felted Bunnies and hop on into spring.
Easy Wooly Felted Bunny
I recently hosted, not taught mind you, a beginners knitting class. As host it was my job to gather supplies, make coffee and get lunch ready, believe me the teacher had the harder job. I mentored which meant I also sat with new knitters and helped them figure out where they were going wrong, that was hard enough for me!
Our first-time knitters were learning the art of casting on, knitting, and casting off and were also making little simple knitted bunnies. Our teacher found the bunny pattern online and it really is simple enough for new knitters to make in under three hours, even with breaks for coffee and lunch.
Don’t Knit? No Problem!
Many other people who didn’t attend the class asked about the bunnies and how hard they would be to make if you didn’t knit. That got me thinking: could someone make these bunnies out of old felted sweaters?
Turns out you can and they are just as sweet as their knitted brethren. And SO MUCH EASIER. Start to finish in under an hour. Great for kids OR adults, I can see these being a great group project with every bunny coming out different and yet just as sweet.
Love Easter?
And recycling?? Try making these Recycled Plastic Easter Egg Cups. Finally, the perfect way to use those plastic Easter Eggs!
What You Need to Make This Easy Wooly Felted Bunny
This bunny is made from a brown felted sweater. If you don’t have one, you can use any color sweater even a printed sweater. Real bunnies come in all colors, and yours can too!
You will need:
- a felted sweater (a thinner one works nicely here about 1/4 inch thick or less, save that big chunky one for mittens)
- embroidery floss
- embroidery needle
- wool roving for stuffing
Felted Wooly Bunny
Equipment
- embroidery floss can match the color of the wool OR you can use a contrasting color
- embroidery needle
Materials
- A piece of a felted sweater a thinner one works nicely here about 1/4 inch thick or less, save that big chunky one for mittens)
- wool roving for stuffing
Instructions
- Cut a square of the felted sweater, roughly 3-4 inches in size, this makes a nice starter bunny
- Fold it in half and make sure it’s pretty square, not aiming for perfect just very close
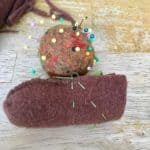
- Sew a running stitch (I used a contrasting color to help the stitches show up-you can use a matching color to make the stitches invisible) a little over halfway up from the bottom
- Then sew a 2nd running stitch in a triangle shape in the top of the square as shown in the picture

- Fold in half lengthwise, sew from the first running stitch, down the back

- then without tying off or making a knot sew a running stitch down and around the bottom as shown in the pictures, pull it tight and tightly sew several stitches to hold that seam shut
- In the neck opening poke in a little roving, as much as you like to make a plump bunny

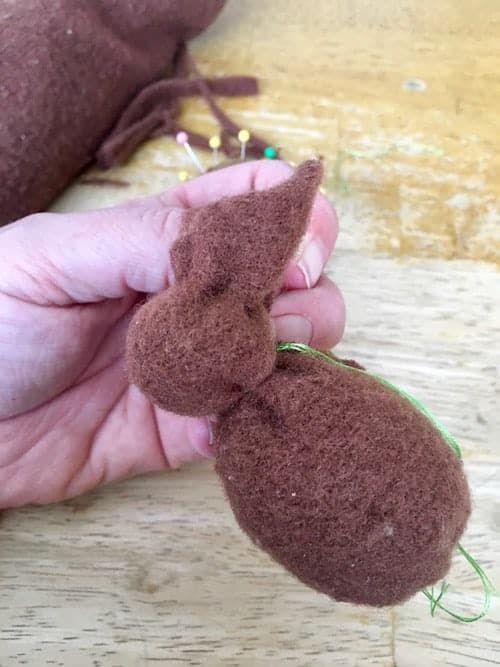
- Pull that first running stitch to cinch up the neck, add more roving if needed, then tie off the neck

- Pull the second running stitch to form the head, add a little roving to the head, adjust as needed and tie off
- Trim the threads and add a tail and you’re done
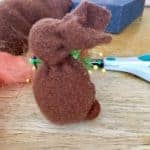
- wool roving is easy to manipulate so if you want your bunny to sit up just smoosh the bunny down and encourage it into place