
How to Ferment – A Beginners Guide
Curious about fermented food? Chances are you’ve eaten it for years; sauerkraut on the side, pickles on your burger or a tall glass of kombucha. Discover the benefits of fermentation, and learn how to get started fermenting vegetables at home.
What is fermenting?
Fermenting vegetables is an ancient food preservation technique that uses salt and water to preserve food. Like water bath canning jams or jellies, this is another method of preserving food. You can safely store fermented food for months or even years as long as you store it properly.
Fermenting VS Pickling
Is fermenting just pickling? Not quite. While they can be seen as similar final products, they are, in fact, quite different.
Fermenting:
- Process: Relies on the presence of salt and water to create a brine in which beneficial bacteria (mainly lactobacilli) thrive, converting sugars into lactic acid, which acts as a natural preservative.
- Flavor Development: The fermentation process enhances the flavors, making them more complex and often resulting in a tangy or sour taste that is characteristic of lacto-fermented foods.
- Health Benefits: Fermented foods are rich in probiotics and enzymes, promoting gut health and aiding digestion.
Pickling:
- Process: Uses vinegar (acidic solution) or a mixture of water and vinegar, sometimes with salt and various spices, to preserve food. This environment prevents the growth of spoilage-causing microorganisms.
- Flavor Development: Pickling imparts a tangy or sour taste to the food, heavily influenced by the vinegar and spices used in the pickling solution.
- Preservation Method: Pickling preserves food through acidity from the pickling solution, rather than through the natural fermentation process by live bacteria.
Benefits of fermenting vegetables
Learning how to ferment at home is easy and may benefit your health and wallet. Some ways fermented vegetables may help you include:
- Boost your gut health with probiotics found in fermented foods.
- Preserve your garden harvest inexpensively without relying on electric appliances like fridges or freezers.
- Enhance your meals with unique flavors and textures.
“I took a class on making kombucha at home and immediately became obsessed with all things kombucha, especially coming up with fresh flavors. Fermenting was easier than I thought it would be. The class helped to break things down in a helpful, friendly way.”
— Susannah Brinkley Henry, Feast + West
Popular fermented foods
You’ve tasted fermented foods if you’ve eaten or sipped the following.
- Yogurt
- Wine
- Beer
- Sourdough bread
- Kombucha
- Sauerkraut
- Kimchi
- Tempeh
- Natto
- Miso
How Fermenting Works
Through fermentation, bacteria and yeast break down the sugars in vegetables. This process, lacto-fermentation, produces lactic acid, which acts as a natural preservative. Lactic acid gives fermented foods a tangy flavor and enhances their nutritional value with higher vitamin levels and probiotics for gut health.
To ferment your veggies successfully, you must create an anaerobic environment (without oxygen) so the good bacteria can thrive while harmful ones are kept at bay. So it’s vital to keep air from getting into your ferment. Use a fermenting kit that will let air out while not letting any any air into the jar or bottle.
Fermenting Tools
Gather your fermenting equipment. Fermentation equipment is pretty basic. Here’s what you’ll need:
- Wide-mouth glass jars or fermentation crocks to hold your veggies during fermentation
- Weights to submerge the vegetables in brine. Use a small plate or even clean rocks
- Non-iodized salt, such as sea salt
- Filtered water
- Fresh organic vegetables were picked within the past 24 hours. Choose from favorites like cabbage for sauerkraut or cucumbers for pickles
Get Started
Here’s how to get started once you’ve gathered the tools for fermentation.
- Wash all your fermenting equipment and supplies thoroughly with hot water.
- Prepare vegetables, choose fresh vegetables from your garden or local farmer’s market, and clean your veggies thoroughly to remove any dirt or bugs
- Cut your vegetables into uniform pieces.
Prepare the Brine
Be sure you’ve chosen a pickling or high-quality sea salt without additives. Don’t use iodized table salt, as it interferes with fermenting. Use dry salt or make a brine by combining the salt with water.
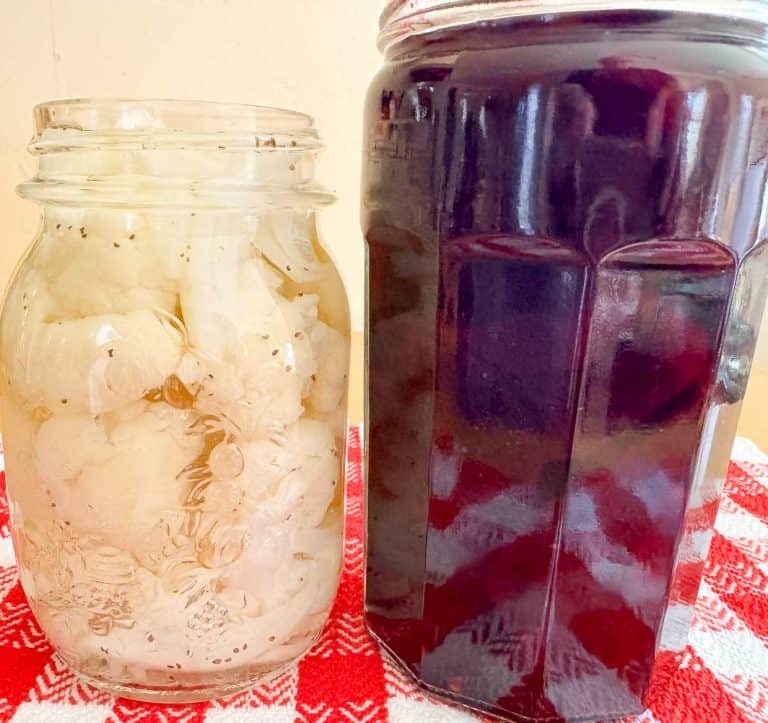
Add Vegetables
Place prepared vegetables in the fermenting crock and cover them entirely with brine. Weigh the veggies down with your plate or rock. Set your crock in a cool, dark place at 70 to 75 F.
The fermentation time depends on the recipe you use and may take anywhere from a week to several weeks. It depends on the temperature, the size of each veggie piece, and the vegetable itself. You should find this information in your chosen recipe.
For more information on fermentation, including recipes, salting techniques and ratios, visit the National Center for Home Food Preservation.
Fermenting Tips
To keep your fermented foods safe for longer, keep them in sealed containers, which provide an oxygen-free environment. Ensure the vegetables remain covered with brine. Store the containers in a fridge or a cool, dark area like a closed pantry, basement, or cupboard.
Enjoy fermented veggies as a tasty snack, side dish, or in your favorite recipes. For example, add pickled cucumbers, canned tuna, or fermented carrots to salads for a flavorful twist.
Remember to follow proven food preservation techniques to avoid creating contaminated and unsafe food. Invest in a book like the “Ball Complete Book of Home Preserving” for detailed, step-by-step instructions for safe fermentation methods.
Fermenting vegetables is an inexpensive and straightforward way to preserve your garden harvest and add healthy probiotics to your diet. With just a few supplies and patience, fermenting veggies at home is easy.


2 Comments