DIY Sourdough Starter
There’s nothing quite like a fresh loaf of sourdough bread slathered in butter. And while all things sourdough have led to an explosion in storebought sourdough starters, they aren’t necessary. Making a homemade sourdough starter without yeast is simple. Here’s how.
There are many great sourdough recipes to enjoy. Luckily, making your own sourdough starter is so easy.
Why Make Your Own Sourdough Starter
Starting sourdough is the simple process of making wild yeast by fermenting flour and water. When you make your own starter, you know the exact ingredients.
You won’t need to worry about unwanted chemicals or preservatives. Sourdough starter lets you make homebaked bread without depending on commercial yeast for every loaf.
Now, maybe you’ve already experimented with fermenting vegetables or other foods. Or perhaps you’ve stocked your pantry shelves with long-shelf-life foods because you want to become more self-reliant.
If so, making a homemade sourdough starter without yeast is a great project. This homemade recipe gives you wonderful satisfaction.
“My sourdough starter was doing really poorly for a while. But as soon as I started using a different flour my starter instantly became healthy again. Pay attention to the protein content of your flour.”
— Susannah Brinkley Henry, Feast + West

Sourdough Starter Supplies
Please don’t buy ANY special tools or ingredients to make a sourdough starter. You just don’t need it. What you do need is just a couple of things:
- Unbleached all-purpose flour
- Water and preferably non-chlorinated fresh water
- A large mason jar or clean glass container with a lid
- Wooden spoon or a silicone spatula
Pretty simple, right?
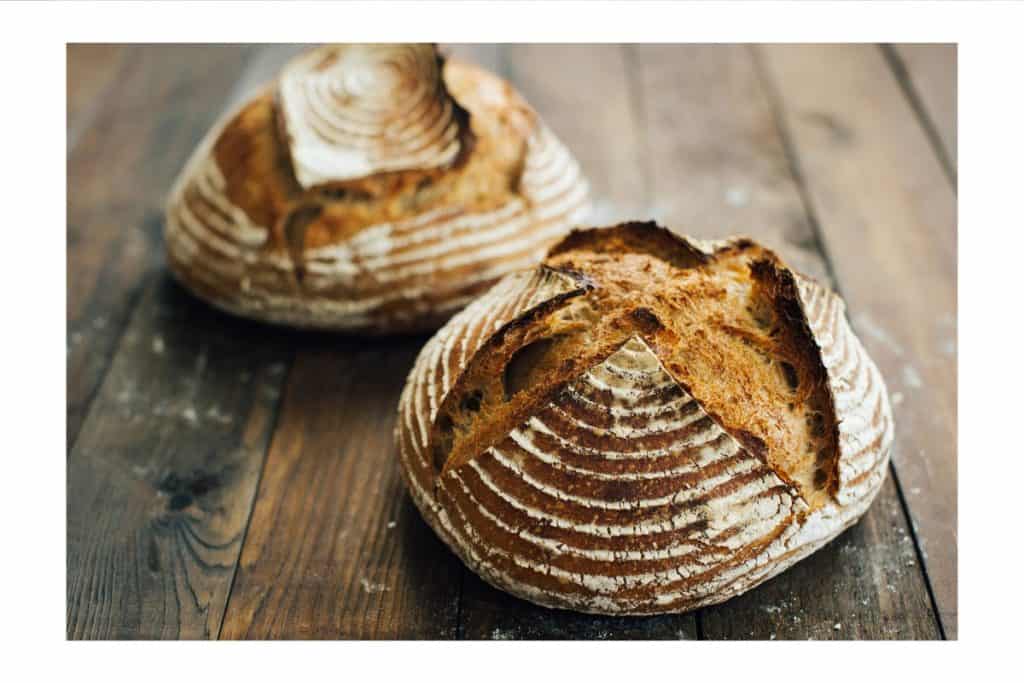
Old-fashioned sourdough starter
Making a sourdough starter is easy, even for beginner bakers. After all, this is what the pioneers made and carried across the country 200 years ago.
However, monitoring and feeding the starter takes a little more skill. Above all, it takes time.
How to store your sourdough starter
Leave it on the counter if you plan to use your starter in recipes twice a week or more. And remember to continue to discard half the starter and feed it daily. On the other hand, if you plan to do a little once a week, keep your sourdough in the fridge and feed it weekly.
When ready to use it, remove it from the fridge the night before baking your favorite sourdough bread recipes.
Remember to feed it while it’s at room temperature. A good homemade starter can last years when stored correctly and fed regularly. Or decades. Literally.
Make sourdough starter with whole wheat flour
For a change, substitute whole wheat or rye flour for all-purpose flour. You can also combine kinds of wheat.
Start your sourdough with whole wheat flour at the very beginning. Then, alternate feeding it with all-purpose flour every other day for a rich, pleasant flavor. Try this Dutch oven artisan sourdough bread recipe for a rustic loaf.
When the starter won’t bubble
The most common reason sourdough starter doesn’t bubble is a cold temperature. Move the glass jar to a warmer location, like a cold oven or beside a wood stove. I like to keep mine right on the counter by the stove in the winter, and in my pantry in the summer.
Don’t want to wait?
A sourdough starter takes time! If you’re in a hurry or just impatient, you can make a faux sourdough in your slow cooker! You just need some Greek yogurt and yeast, and you’re off and making a fermented-tasting loaf in no time at all.
Ideas For Sourdough Discard
When you make your starter you’ll have lots of what is called discard. This discard is perfect for adding to other recipes to give it a little upmh! Try these chocolate chip cookies made with sourdough discard.

DIY Sourdough Starter
Equipment
- quart jar
- wooden spoon
Ingredients
- 1/2 cup water
- 1/4 cup unbleached flour
Instructions
- Day 1: Combine half a cup of water and a quarter cup of unbleached all-purpose flour in your glass jar on the first day. Take note — the mixture will be thick. Mix the flour and water using a wooden spoon or rubber spatula.
- Day 2: let it sit
- Day 3: On day three, you should notice some dark liquid floating on top. This is known as the hooch. This is the mixture telling you it is ready to be fed.
- Day 3: To feed your starter, first scoop out half of the mixture. Either throw it away or use it in your favorite sourdough discard recipes. Then stir in another half a cup of flour and a quarter cup of water.
- Days 4 through 7: Every day from day four to seven, repeat that feeding process. Scoop out half the mixture and add another half cup of flour and a quarter cup of water.
- You may have to do this for up to 14 days, depending on when the starter is ready. And this depends on various conditions, including the wild yeast spores in your region and your home’s temperature.
- Day 7 or 8: Your homemade starter should be ready by day seven or eight. It will be full of bubbles and double in size, and it should look fluffy.
- If your homemade sourdough starter is NOT ready, don’t panic. Sometimes, it just takes a little longer. Once the starter has reached the ready stage, it’s time to transfer it to a fresh jar.